A whole array of $KREST airdrops is already underway, much to the community’s excitement. In some of these, the tokens are vested, or set to be released over a period of time as opposed to being released immediately. This does not happen automatically — the user has to manually claim the vested tokens as they become available. So without further ado, here’s a handy guide on how you can do that.
Note: This guide only applies to the Polkadot.js browser extension wallet, a guide for hardware wallets is in the works.
How to enable the use of your account on all chains
If you already know your address on krest, feel free to skip this part, as you won’t find anything new here. If you’re not sure, or if you only have a Polkadot wallet — stick around, as it might come in handy.
To get a krest address, you have to enable the use of your Polkadot.js account on all chains. If this made you raise an eyebrow, don’t worry: Here’s a detailed guide on how to set up your first Polkadot.js account and make it compatible with krest.
Now, if you already have a Polkadot account, but aren’t sure what it has to do with krest, here’s a quick guide on how to set it to work with all chains.
Step 1: Open your Polkadot.js browser extension
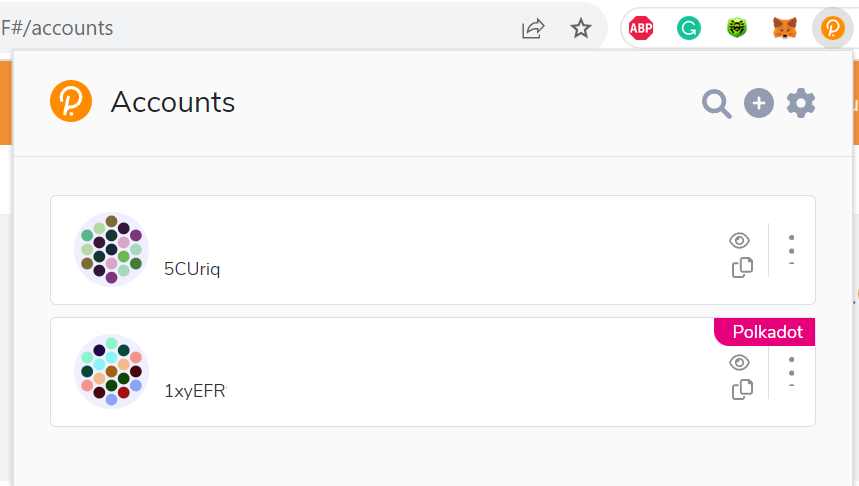
Step 2. Find the account you want to convert for using on all chains, including krest, and open its menu by clicking the three dots on the right.
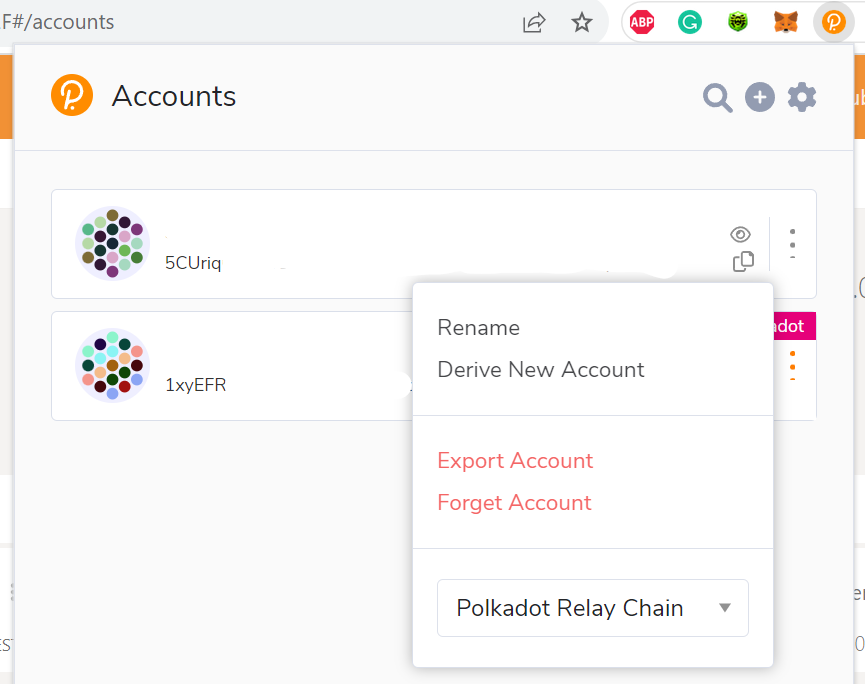
Step 3. In the dropdown menu, pick the option “Allow use on any chain”. Select that option.
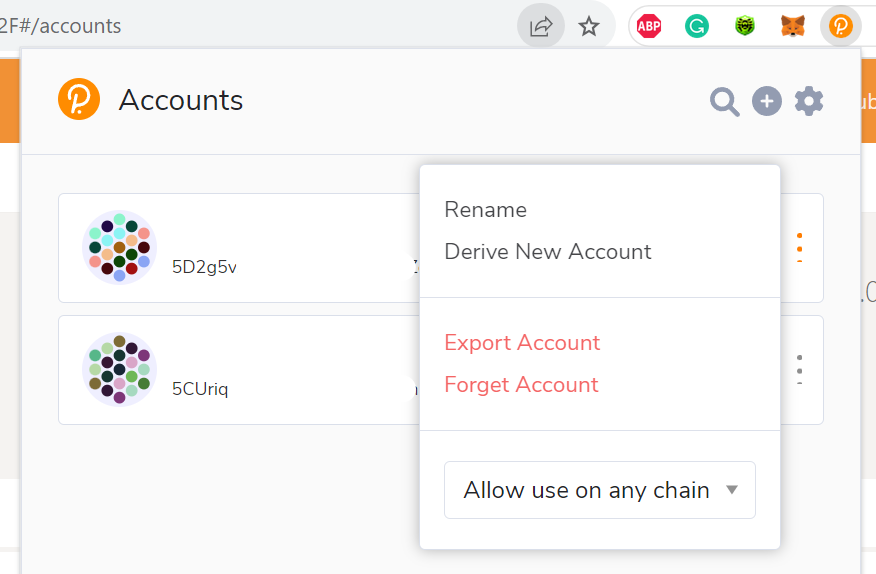
You will notice that the address on the account has changed — which means you just got yourself a new address on krest, as well as a plethora of other Kusama and Polkadot parachains. Use this address for the airdrops; you can check up on it here at Polkadot.js or look it up here at Subscan.
How to check up your $KREST vesting information
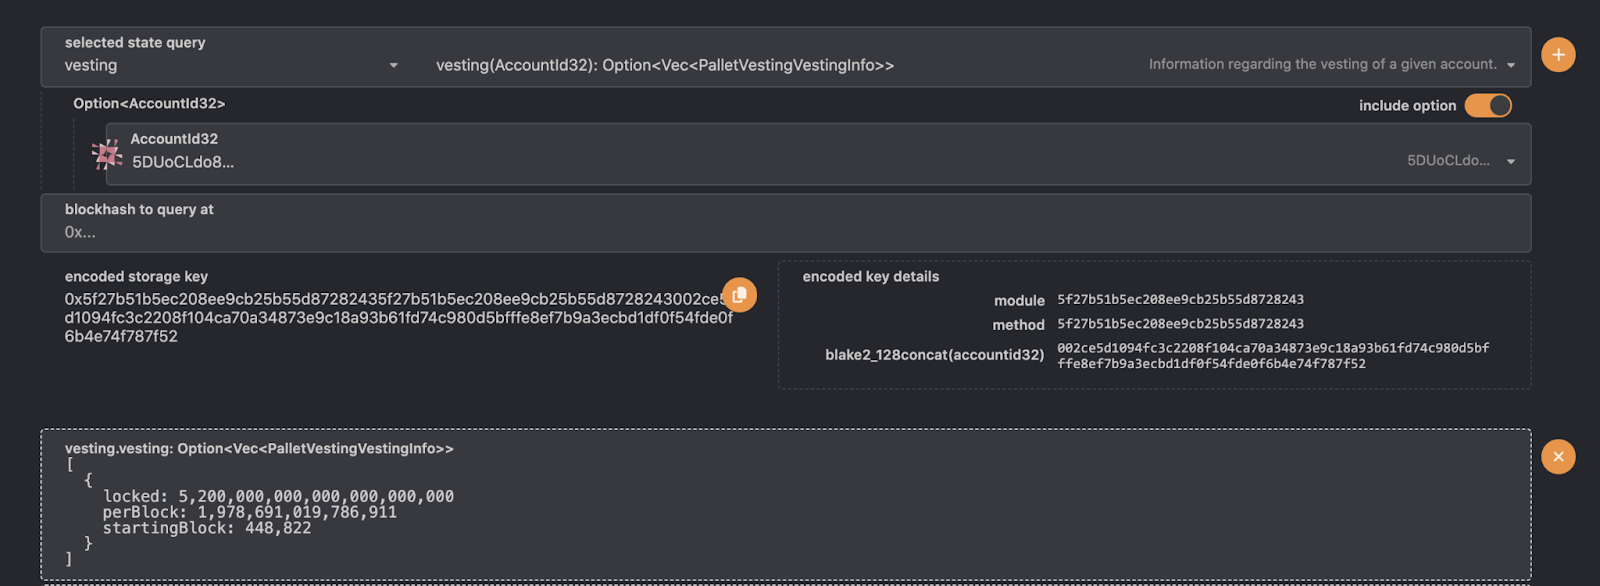
As noted before, vested tokens are released over time. To be more specific, with $KREST, they are actually transferred to the target address in full, but in a locked state, so that the user can claim them as they are unlocked with every new block on krest network.
In other words, vesting on krest involves three variables:
- locked: How many tokens are locked in total for a specific account.
- perBlock: How many tokens are unlocked every time a new block goes live.
- startingBlock: The block where the token unlocking process begins.
Here’s how you can check up on your vested tokens.
Step 1. Head to polkadot.js app and select Developer -> Chain state on the navigation bar. Here’s the link that takes you right there, for your convenience.

Step 2. Select “vesting” in the dropdown menu under “selected state query”. In the dropdown next to it, which says “palletVersion(): u16” when loading the page, select “vesting (AccountId32)”.

Step 3. Click on the orange plus button on the right to run the query you just modified. Polkadot.js will then display you the vesting information for the account you specified in the query.
How to claim your vested tokens
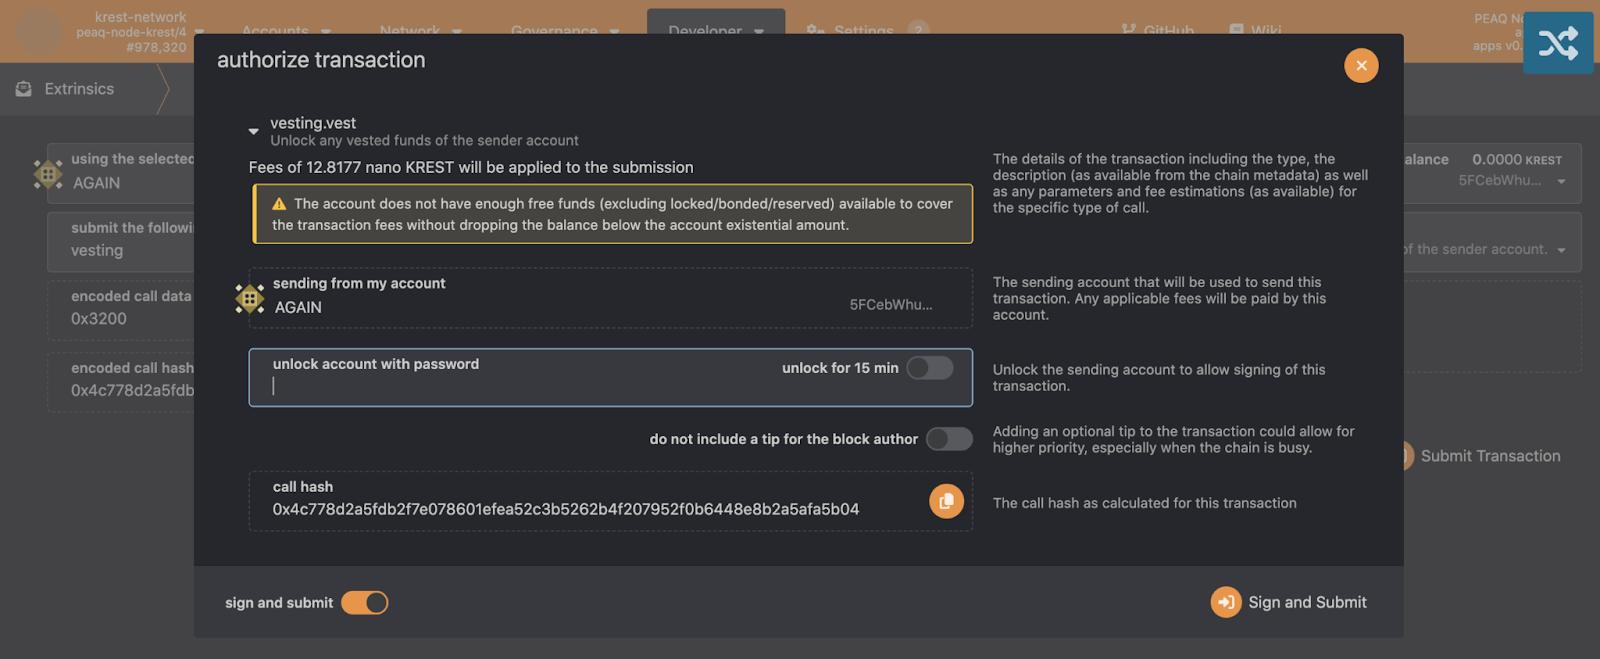
It’s nice to see the vested tokens on your account, but it’s even nicer to unlock them. To do so, you’d need to generate a specific extrinsic — think of it as a special function call leveraging one of the building blocks that were used when bringing krest to life. Here’s how you can do that — check out the video guide below or go through the following steps:
Step 1. Head to polkadot.js app and select Developer -> Extrinsic on the navigation bar. Here’s your shortcut link.

Step 2. In the dropdown menu under “submit the following extrinsic”, select “vesting”. In the dropdown menu next to it, select “vest()”, which will unlock all available vested tokens on your selected account.

Optional: You can also select “vestOther()” to unlock the vested tokens on another account if you want to help other community members deal with their vesting.

Step 3. Send the extrinsic by clicking the “Submit Transaction” button in the lower-right corner.
And that’s it! Now, you can enjoy your tokens and take part in the upcoming $PEAQ airdrop, if you have enough $KREST on your account.


